How to Do Ombré Nails With a Sponge
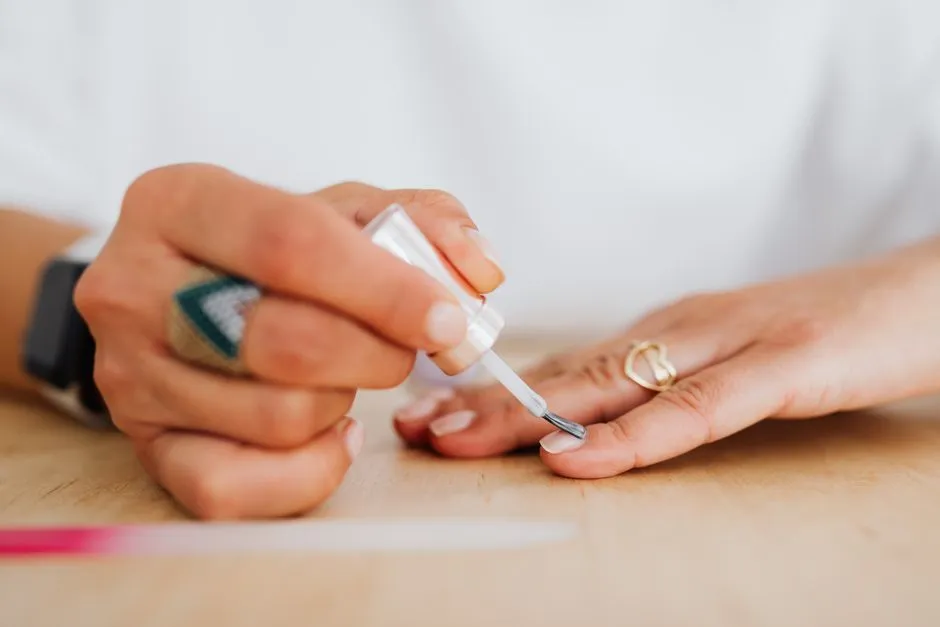
- Use thin sponge layers, not one heavy stamp
- What you need
- Pick colours that can meet in the middle
- Set up before opening every bottle
- Protect the skin without coating the nail
- Step 1: apply base coat and the pale colour
- Step 2: make two overlapping stripes
- Step 3: test one stamp
- Step 4: tap the first thin pass
- Step 5: build opacity in two or three passes
- Step 6: remove the barrier and clean the edges
- Step 7: float on top coat
- A ten-nail working order
- Fix the gradient by diagnosing the exact problem
- Adapt the placement to nail length
- Remove it like regular polish
- Make the second hand easier than the first
Use thin sponge layers, not one heavy stamp
To do ombré nails with regular polish, apply base coat and one thin coat of the lighter colour. Paint two overlapping colour stripes on a dense cosmetic sponge, then tap the sponge onto each nail with small side-to-side movements. Reload and repeat in two or three thin passes, letting each pass become surface-dry first. Clean the skin, wait until the gradient no longer dents easily, and float on top coat to smooth the texture.
The first pass will look faint and slightly speckled. That is correct. The gradient becomes even through repetition; one saturated press is more likely to flood the cuticle, leave sponge marks, and merge both colours into a third colour with no visible fade.
This tutorial uses ordinary air-dry nail lacquer, not gel, dip powder, or acrylic. Those systems have different application, curing, and removal requirements.
What you need
- base coat;
- two regular nail polishes;
- clear top coat;
- one dense, clean cosmetic wedge or nail-art sponge;
- a small disposable surface for testing the gradient;
- cotton swabs or a small cleanup brush;
- the remover recommended for your polish;
- optional skin barrier made for nail art, used exactly as labelled; and
- a timer, good light, and ventilation.
Choose polishes with similar coverage if possible. Two opaque creams are easier to blend than one opaque cream and one transparent jelly. Shimmer can be forgiving because reflected light disguises tiny irregularities, while chalky pastels show every abrupt edge.
You do not need a special ombré machine or a box of fifty tools. A dense cosmetic wedge gives enough control for a first attempt. Cut a fresh working face for each session, and do not share used porous sponges.
Pick colours that can meet in the middle
For the easiest first gradient, choose two colours that are close on the colour wheel or differ mainly in lightness:
- pale pink into berry;
- light blue into navy;
- peach into coral;
- lilac into purple; or
- beige into brown.
Strong complementary pairs can create a dull middle when their wet edges mix. Red and green, blue and orange, or purple and yellow can still work, but add a related transition colour or leave a narrower overlap. Test the stripe order on the sponge and stamp once on a disposable surface before working on your nails.
The base colour should usually be the lighter shade. A pale base gives the sponged colours a consistent background and reduces the number of passes needed. White makes bright shades vivid, but it also makes missed spots obvious. For a softer result, use the lighter gradient colour itself.
Set up before opening every bottle
Work on a stable table in a well-ventilated room, away from flame and heat. FDA nail-product safety guidance advises following label directions and warning statements and using good ventilation. Keep remover and polish closed when not in use.
Wash and dry your hands. Remove old polish completely. Shape the free edge before painting; our nail-shape guide compares round, oval, square, squoval, almond, and other outlines without insisting every hand wants the same one.
Do not cut living cuticle or work over broken, inflamed, painful, or infected-looking skin. The American Academy of Dermatology's manicure safety advice recommends leaving cuticles alone because they protect the nail root. If a nail or surrounding skin has a persistent change, pause cosmetic work and ask a board-certified dermatologist or other qualified clinician.
Arrange bottles in use order: base, light colour, dark colour, top coat. Unscrew and re-close each as needed rather than leaving them all open. Cut ten small sponge faces now if you prefer one fresh piece per nail.
Protect the skin without coating the nail
Sponging deliberately sends colour beyond the nail plate. A labelled peel-off nail barrier can shorten cleanup; apply it around the nail without touching the nail surface, and let it dry as directed. Do not use a latex product if you have a latex allergy.
Tape can also shield the sidewalls, though it is awkward around the curved cuticle. Leave a narrow gap so adhesive does not pull on sensitive skin. The simplest option is no barrier at all: use controlled taps, then clean with a small brush.
Whatever you choose, keep oily products off the nail plate. Oil or petroleum jelly under the base coat can interfere with adhesion and leave bare patches. If any reaches the nail, wash and dry it again before painting.
Step 1: apply base coat and the pale colour
Apply one thin layer of base coat, keeping it off the skin. Let it dry according to the product label.
Add one thin coat of the lighter gradient colour. It does not need to be perfectly opaque; it needs to create an even field without ridges or flooded sidewalls. An OPI sponge nail-art tutorial uses one base-colour coat and allows 1 to 2 minutes before sponging. Treat that timing as its product instruction, not a promise for every lacquer. Wait until your coat looks even and does not move under a very light touch at the edge.
If the pale colour is extremely sheer, use a second thin coat and extend the wait. A wet base will lift when the sponge returns.
Step 2: make two overlapping stripes
On the flat face of the sponge, paint a stripe of the lighter polish slightly wider than the nail. Paint the darker colour directly beside it with a 2- to 3-millimetre overlap. Each stripe should be about the length of the visible nail, from cuticle area to free edge.
Brush polish onto the sponge with two or three normal bottle-brush strokes per colour. The surface should look evenly damp, not soaked through. If polish pools or runs down the sponge, use a fresh face and less product.
The stripe at the top of the sponge will land near the cuticle if you align that edge first. Decide before stamping whether the gradient runs light-to-dark from cuticle to tip or in the other direction.
Step 3: test one stamp
Press the prepared sponge once onto a disposable plastic lid, silicone mat, or piece of foil. Look for three things:
- both colours transfer;
- the overlap reads as a transition rather than a hard gap; and
- the sponge texture is fine rather than full of large holes.
If the middle disappears, reduce the overlap. If there is a bare line, increase it slightly. If the colours blend into one flat shade, use shorter taps and reload fresh parallel stripes instead of repeatedly rolling the same wet sponge.
The test uses a little polish and saves an entire removal-and-restart cycle. This is a good bargain.
Step 4: tap the first thin pass
Align the sponge so the colour boundary crosses the nail at the intended height. Press lightly, lift, move about 1 millimetre toward the cuticle, press again, then move back toward the tip. Use three to five quick taps rather than one long, crushing press.
The tiny movement softens the boundary. Keep the sponge face roughly parallel to the nail so both sides receive colour. For a curved nail, use a gentle rolling motion from one sidewall to the other, but do not drag across the surface.
Reload the stripes before each nail. Polish begins drying on the sponge immediately; a half-dry stamp can pull up the layer below or leave crumbs. Replace the sponge face when it feels stiff, tears, or begins shedding.
Step 5: build opacity in two or three passes
Let the first pass become surface-dry. Depending on the lacquer, room, and thickness, this may take several minutes. Follow the product's stated dry-time guidance and watch the surface: it should lose its wet shine and should not string when touched at the protected skin edge.
Paint fresh overlapping stripes on the sponge and repeat the light tapping motion. Shift the sponge a fraction up and down across the join rather than hitting exactly the same boundary every time. That small variation makes the transition look gradual.
Most combinations need two or three sponged passes over the base colour. Stop when the colours are even enough at normal viewing distance. A fourth heavy pass often adds texture more efficiently than it adds beauty.
If one nail remains pale, correct that nail alone. There is no prize for giving every finger an unnecessary extra layer in the name of fairness.
Step 6: remove the barrier and clean the edges
If you used a peel-off barrier, remove it according to its directions while the surrounding polish is still manageable. Pull away from the painted nail, not across it.
Dip a small cleanup brush in the appropriate remover, blot the excess, and trace around the cuticle and sidewalls. Keep remover off the fresh gradient. Use a fresh cotton-swab end for broader skin marks rather than wiping dissolved colour back and forth.
Do not scrape skin with a metal tool. If polish has entered a cut or causes burning, swelling, blistering, or a spreading rash, stop, rinse as the label directs, and seek medical advice when symptoms are significant or persistent. FDA notes that infections and allergic reactions can occur with some nail products.
Step 7: float on top coat
Wait until the gradient is surface-dry and resists a light touch at the edge. Load the top-coat brush generously enough that its bristles can glide without digging into the colour. Place a bead near the cuticle, push it close without flooding, and pull to the tip in three or four strokes.
This “floating” motion smooths sponge texture and reduces colour dragging. Wiping the same area repeatedly can streak the dark shade into the light one. Seal the free edge with one thin pass if the top-coat label supports it.
One smoothing coat is usually enough. A very textured gradient may take a second coat after the first dries, but adding thickness also extends drying time. Keep hands away from zips, keys, bedding, and hair until the finish no longer dents with ordinary gentle contact.
A ten-nail working order
Instead of finishing one nail from first sponge layer to top coat, move through the hand in rounds:
- Apply base coat to all ten nails.
- Apply the pale colour to all ten.
- Sponge pass one from the first nail to the tenth.
- Return to the first nail for pass two.
- Add a third pass only where needed.
- Remove barriers and clean edges.
- Top-coat from the first nail to the tenth.
This rotation creates drying time without asking you to stare at a timer. If you are painting your dominant hand, do it first. The steadier hand is then available for the more awkward cleanup.
For a broader foundation in dots, stripes, and tool control, nail art for beginners has ten designs that use many of the same patience-and-layering skills.
Fix the gradient by diagnosing the exact problem
| What you see | Likely cause | Next attempt |
|---|---|---|
| A hard line between colours | Stripes did not overlap, or the sponge did not move | Add a 2- to 3-mm overlap and tap 1 mm each side of the boundary |
| One muddy colour | Too much wet blending or strongly opposing colours | Use thinner passes, less overlap, or a transition shade |
| Bare pinholes | Sponge is too coarse or too dry | Switch to a denser cosmetic sponge and reload lightly |
| Raised texture | Too much polish in one pass | Build two or three thin passes and float on top coat |
| Pieces of sponge on the nail | Sponge is breaking down or polish dried on it | Stop, lift debris carefully, and use a fresh face |
| Base colour lifts | Base was still wet or sponge was dragged | Extend drying and use quick vertical taps |
| Dark polish floods the cuticle | Sponge stripe was too wide or too wet | Narrow the stripe and blot one test stamp first |
| Top coat smears the fade | Brush pressed into colour or made too many strokes | Use a fuller brush and glide in three or four passes |
Correct the cause rather than adding another coat to every problem. More polish cannot turn a coarse sponge into a fine one or make a wet base dry underneath.
Adapt the placement to nail length
On short nails, use a narrow overlap and let the transition occupy roughly the middle third of the visible nail. Two colours are enough. A three-colour gradient can compress into stripes when there is little distance between cuticle and tip.
On longer nails, widen the soft middle by moving the sponge slightly farther between taps. You can also use three narrow stripes, but test them first; each colour must remain visible after overlap.
For a tip fade, paint the whole nail in the base colour and put only the accent shade on one edge of the sponge. Tap most pigment at the free edge, then use the last trace of colour slightly lower. For an “aura” placement, use a small rounded sponge and concentrate a contrasting colour at the centre rather than making horizontal stripes.
Remove it like regular polish
This method does not change the polish chemistry. Remove it with the remover named for the regular lacquer, holding a saturated pad briefly against each nail before wiping from cuticle toward tip. Repeated dry rubbing creates more friction and spreads pigment around the skin.
Wash hands after removal and apply moisturiser to nails and surrounding skin. Do not peel the manicure off; peeling can lift surface layers of the natural nail along with the polish.
If you used gel instead of ordinary lacquer, follow the gel manufacturer's curing and removal system. Do not convert these air-dry timings into lamp timings. The AAD's gel manicure guidance covers UV protection and advises against picking off gel colour.
Make the second hand easier than the first
The reliable ombré method is simple: a dry-enough base, parallel overlapping stripes, a dense sponge, and several light passes. Test once, reload often, and stop before the surface becomes thick.
Your first nail is allowed to be reconnaissance. Adjust the overlap or pressure, then use that information on the remaining nine. By the second hand, the sponge usually feels less like a mysterious beauty device and more like what it is: a small piece of foam with one manageable job.